
Launching your first Django app can feel intimidating, especially if you’re new to Python, virtual environments, Linux servers, or deployment in general. We’ve all been there.
That’s why this guide walks you step-by-step through deploying the Ephany Framework, using an inexpensive $8 DigitalOcean Droplet. We’re keeping everything as clear and simple as possible so you can follow along, even if this is your very first time working with a cloud server.
By the end of this tutorial, you’ll have:
- A live Ephany Framework app (including the REST API)
- A running app through Gunicorn and served by Nginx
- A dedicated
dev.pysettings file for your own settings overrides - An admin interface to manage asset data
Note: The instructions in this guide are meant for setting up a development server for the Ephany Framework. This setup is perfect for testing, learning Django, or previewing the Ephany Framework online, but it is not recommended for production. A production deployment requires additional steps such as HTTPS, hardened security settings, firewall rules, and a more robust database configuration. This guide keeps things simple so beginners can get Ephany running quickly and confidently. Keep an eye out for part 2 of this tutorial which will guide you through the rest of the steps needed for a production-level API.
Let’s get started.
1. Create Your DigitalOcean Account
Start by creating an account on DigitalOcean:
Create an account using email or GitHub.
DigitalOcean will ask for a payment method, but the smallest Droplet is just $8/month.
2. Create a Ubuntu Droplet for Ephany
- Click Create → Droplet
- Choose Ubuntu 22.04 or Ubuntu 24.04 LTS
- Under plans: choose Basic, 1GB RAM (the $8 plan)
- Add your SSH key or password
- Click Create Droplet
Copy the IP address shown — you’ll need it throughout this guide.
3. Log Into Your Server
Now, you’ll need to do some fun command-line work. If you’re new to SSH, check out this comprehensive tutorial: https://tsh.io/blog/ssh-tutorial.
To jump into an SSH session simply open your Command Prompt on Windows (Terminal on Apple) and run the following command:
ssh root@YOUR_DROPLET_IP
Accept the fingerprint if prompted.
You’re now logged in as root.
4. Install System Packages
Update your server and install the essentials:
apt update && apt upgrade -y
apt install -y python3 python3-venv python3-pip nginx git
This gives us Python, Git, and Nginx (the web server we’ll use later).
5. Create a Non-Root User for Ephany
It’s best practice not to run your app as root, so we will create a user specifically to deploy Ephany.
adduser deploy
usermod -aG sudo deploy
su - deploy
Now the rest of your work will be executed as the deploy user.
6. Clone the Ephany Framework Repository
Choose where you want the app to live, e.g.:
cd ~
git clone https://github.com/TripleZeroLabs/Ephany-Framework.git app
cd app
Your project root should now contain manage.py and the ephany Django project folder (or whatever your main project folder is named).
7. Create and Activate a Python Virtual Environment (venv)
A virtual environment creates a clean, isolated workspace for the Ephany Framework. It keeps all Python and Django dependencies separate from the system’s default Python installation so nothing conflicts. This makes your app more stable, easier to manage, and ensures everyone runs the same versions of the required libraries. If something ever breaks, you can recreate the venv without affecting the rest of the server.
python3 -m venv venv
source venv/bin/activate
Once activated, your terminal prompt will start with (venv).
Now upgrade pip and install your project requirements:
pip install --upgrade pip
pip install -r requirements.txt
The Ephany Framework dependencies are now installed cleanly into your virtual environment.
8. Configure Your Django Settings (base.py + dev.py)
The Ephany Framework uses a settings structure designed for open-source contributors:
ephany/
    settings/
        base.py        ← committed to GitHub
        dev.py         ← private to your server
        __init__.py
Base Settings
base.py contains generic settings used everywhere.
It also expects environment variables for things like:
ALLOWED_HOSTS = os.getenv("DJANGO_ALLOWED_HOSTS", "").split()
DEBUG = os.getenv("DJANGO_DEBUG", "False") == "True"
Your Server-Specific dev.py
Create this file:
cd ephany_framework/settings
nano dev.py
Add the following lines:
from .base import *

DEBUG = False

ALLOWED_HOSTS = [
    "YOUR_DROPLET_IP",
    "127.0.0.1",
    "localhost",
]
Note that the settings defined in this file will not be committed to the open source project, so it will not impact any settings with the rest of the Ephany Framework developers across the community.
Tell Django to use dev.py
Go back to your app root and create/edit .env:
cd ~/app
nano .env
Add the following lines:
DJANGO_SETTINGS_MODULE=ephany_framework.settings.dev
DJANGO_ALLOWED_HOSTS=YOUR_DROPLET_IP 127.0.0.1 localhost
DJANGO_DEBUG=False
DJANGO_SECRET_KEY=your-production-secret-key
This ensures:
- Your server uses
dev.py - Your Allowed Hosts are configured correctly
- Debug mode is disabled in a production-ish environment
Making Your Server Persist Using the Dev Settings File
When we create a settings/dev.py file on the server, you server doesn’t automatically use it with every session. By default, Django loads settings/base.py, which can cause issues like ALLOWED_HOSTS errors when you access your Droplet’s IP. To fix this, we set an environment variable called DJANGO_SETTINGS_MODULE so Django knows exactly which settings file to use. Adding this line to our ~/.bashrc ensures Django always uses ephany_framework.settings.dev for every session:
export DJANGO_SETTINGS_MODULE=ephany_framework.settings.dev
This keeps your development server consistent and prevents Django from falling back to the wrong settings file.
9. Apply Migrations and Collect Static Files
Make sure your venv is active:
source venv/bin/activate
Then run:
python manage.py migrate
python manage.py collectstatic --noinput
Static files (including Django Admin CSS) will be placed into:
/home/deploy/app/staticfiles/
This path is controlled by the STATIC_ROOT variable that is defined in base.py. If you prefer to host your static files in a different directory, you’ll need to override this configuration in your dev.py file.
10. Test the App Using runserver
Before configuring Nginx or Gunicorn, confirm the Ephany Framework starts correctly:
python manage.py runserver 0.0.0.0:8000
Now visit:
http://YOUR_DROPLET_IP:8000
If you see the Ephany Framework admin login page — you’re good! Nice work so far.
This confirms:
- Your settings are correct
- Allowed Hosts work
- Static files were collected
- The app launches without errors
Stop the server with Ctrl+C.
11. Require API Key Authentication
Without an API key, endpoints invite scraping, excessive traffic, accidental misuse, and in worst cases, intentional abuse. That’s why Ephany Framework supports a lightweight but essential API key system. In development, the framework defaults to open access so contributors can explore the API without friction. In any shared, staged, or production environment, you must enable API key validation.
Creating a key is straightforward:
python manage.py create_apikey "My Client"
This generates a unique token that must be included in every request once protection is enabled:
X-API-Key: <your-api-key>
To enable API authentication, you’ll need to update your .env to include:
API_KEY_AUTH_ENABLED=true
Finally, in your server’s settings override file (ours is called dev.py), add the following:
API_KEY_AUTH_ENABLED = os.getenv("API_KEY_AUTH_ENABLED", "False").lower() == "true"

# All paths starting with any of these prefixes will require an API key when enabled
API_KEY_PROTECTED_PREFIXES = [
    "/api/",
]
When enabled, the API strictly enforces access control. Requests without a key return:
401 Unauthorizedfor missing credentials403 Forbiddenfor invalid or inactive keys
This protects your data layer from unauthorized consumption and ensures that every client accessing your system is explicitly identified.
12. Create a Django Superuser
To access the Ephany Framework admin interface:
python manage.py createsuperuser
Enter:
- Username
- Password
You can now log in at:
http://YOUR_DROPLET_IP:8000/admin
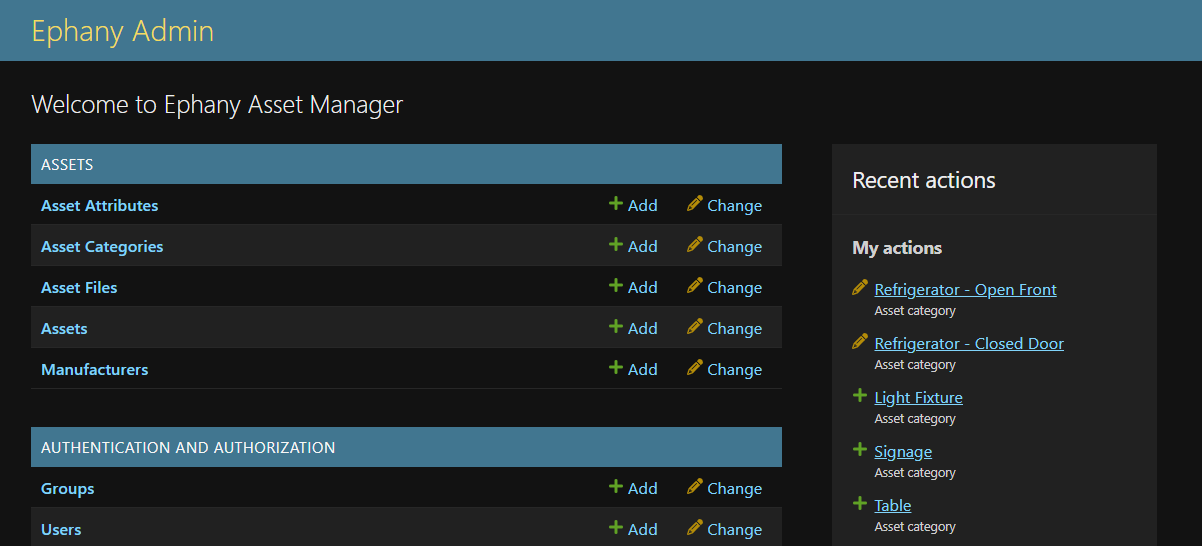
At this point, your development-ready Ephany Framework Django app is fully functional. Once logged in, you will be redirected to the Admin screen where you can start to manage your assets!
🎉 You’re done (for now)!
Whether your goal is to use the Ephany Framework out-of-the-box or contribute to the open source project, you’re off to a great start!
You’ve successfully launched your own instance of the Ephany Framework, which includes:
- A live Ubuntu server
- The Ephany Framework deployed (including the REST API)
- Correct settings separation (
base.pyanddev.py) - Environment variables configured
- Allowed hosts locked down
- Static files collected
- A working admin dashboard
- A
superuseraccount
Next Steps: See Part 2
Your instance of Ephany isn’t quite ready for production yet. Make sure to go through Step 2 of this tutorial to get your instance ready for production: Deploying Ephany Framework to a live web server: Part 2.
Leave a Reply